Inspiration for Building the Vent Hood

Friday, July 31, 2020

The most recent project I completed for the kitchen was the vent hood, so I thought I would share some of the builds I found online that helped inspire my own.  I put it off for months because I wasn't sure how to go about it.  When I finally decided to jump in and get started, I referred back to some of the the inspiration I had pinned and bookmarked for building the hood. 
One of the biggest catalyst for even putting it on my radar, was a post I pinned years ago by Jill over at The Rozy Home.  Seeing the framing she created to build hers was just the inspiration I needed to start ideas turning in my head.  She tweaked the design of her original build over the years to create a metal-look hood.  You would hardly believe that she started with builder-grade oak cabinets and a microwave over the range!
           
DIY BRONZE RANGE HOOD - FINAL 3

She has since moved and created a NEW wood vent hood in the photo below that's just as amazing.  But it was so funny the day I went to pick up materials for my vent hood, I was in line flipping thru a magazine and saw her original metal hood featured in a magazine!


A second inspiration was the wood detail of a vent hood by Jamie over at Whitetail Farmhouse.  Even though it was a stand-alone hood, I loved the worn wood look she created, and the shiplap and trim detailing it had. 

(Whitetail Farmhouse: Blog | Instagram)

One other inspiration I will share is an article by Ashlea written on Remodelaholic about building her vent hood.  She also blogs over at This Mamas Dance.  I think seeing the angles she cut for her framing helped me tremendously.  


Because every kitchen in different, my vent hood didn't end up looking exactly like my inspo.  But they helped me figure out how to create my vent hood.  


But that's the thing I love about blogs and Pinterest.  They can give so many ideas that help us to figure out how to DIY a project!  To see more vent hood inspiration, visit my DIY Vent Hood Pinterest Board.  Next week, I'll share the post on how I actually built my vent hood.
Read More

Beautiful Artwork on a Budget

Thursday, July 30, 2020

If you're like me you probably want nice artwork for your home, but may not want to spend a ton on it.  I want to share a project I did almost five years ago during a One Room Challenge.  I had seen framed botanical prints that I loved, but they were more than I wanted to spend.  So I purchased a Cavallini wall calendar specifically to use it for art.  


These prints were originally around a TV in our previous home, but I knew I would use them again.  


I'm partial to bird prints, botanicals, and maps.  But you can also find calendars of vintage posters, maps, and various other natural curiosities.  The best part is that for about $20 you get 12 prints that can easily be framed. I've paired the prints with inexpensive $10 Ribba frames from Ikea. 

 I'll link below some Cavallini calendars from years past.  


For next year's Cavallini calendars, I found them for pre-sale over at Two Hands Paperie.  Let me know if you give this a try for artwork!


Read More

Series: An 80's Kitchen DIY Reno-{Part 14-Painting the Windows}

Tuesday, July 28, 2020

Once the kitchen was 95% complete last year, I stalled on painting the windows.  I waffled between did I want them to be white or black, and I also dreaded painting all those mullions.  The tedious taping and scraping wasn't something I was looking forward too.  But I happened to catch a post by Lauren over at Blesser House where she used Masking Liquid H2O to paint some french doors, and I was like, "I'm going to try that!"  


The liquid was a little pricey by the gallon, but I caught it on sale.  I've since found it on Amazon by the quart, which is more than enough for a small project like this.  But the time saved makes it worth it, plus I have several other windows that I needed to paint.  Actually, I originally purchased this to paint my bedroom windows and it worked like a charm.  

So to use the Masking Liquid, prep your workspace by covering any exposed surfaces.  Next, make sure the glass and wood is clean and dry.  Paint on a coat of Masking Liquid and allow to dry.  Since I had raw wood, I let it dry overnight to be safe.  Next paint your windows with wild abandon, because you can get paint on the window panes with no worries.  Do two to three coats as needed to have a solid coat of paint.  Then score and peel off the masking liquid. 


This kitchen's come a long way from when we first moved in.


I recorded a few IG videos when I actually painted the windows, so I created a mashup of the process that you can see on my YouTube channel or IGTV.


I don't have any sponsors yet, but this is a product I would recommend and will be using to paint other windows in my home.  Let me know if you give the product a try!


KITCHEN SOURCES (linked below): 

{An 80's Kitchen DIY Reno Series}


-Part 12-Marble Tile Backsplash and Sconces

Read More

Monday Musings-Planning for the First Day of School

Monday, July 27, 2020

The beloved first day of school pics. I have one for my son from every year except Kindergarten.  I think I just wasn't into documenting life at the time.  (I know, it's a shame.)  But every year since then, I've taken pictures to remember what the first day of school looked like.  This year the first day of school will look very different because of the pandemic.  But the first day of school pic is no less important this year.  Perhaps it's one of the most important years to document because of what's happening.  So don't let this year pass you by or feel that it's any less important to remember.  It's often the ordinary, mundane things of life that are the most extraordinary in memory.  

How can we still make the first day special?  Maybe make their favorite breakfast.  Have fresh school supplies ready for them to start the year off right.  Get them excited about picking out their first day of school outfit.  They may not be boarding a bus, but they'll probably be logging on and seeing their fellow classmates for the first time.  And just like we tend to be more productive for a day's work when we get dressed for work, our kids will most likely be more productive if they are dressed for school.  They'll probably feel better and approach their school work with more mental focus if they are dressed for the task.  And bonus, they'll look cute (or handsome) for that first day of school pic that you're going to take!

I'll confess, I usually buy summer clothes in April/May as the school year is ending, and he wears those to start the new year.  But this spring we were mostly trying to just stay home. So my son has been wearing clothes he had from last year, and some are just a little too small because, well, kids grow.  So I thought I would share a few items that I plan on picking up.


We tend to stay pretty basic with graphic tees mixed with athletic and khaki shorts to stay comfortable.  I personally have purchased Cat and Jack tees for my son for the last 3 years.  They're reasonably priced (six bucks!), they wear well, and all of the line comes with a one year warranty.  I've never used it on a tee, but I have on a pair of jeans, so I know they honor the warranty.  It stays pretty hot here until October/November, so I won't pick up too many fall pieces just yet, but I am including a few pairs of jeans.  I'm a little torn about whether he will need a backpack, and if you have a good one from last year, I say just use it.  I've only purchased two backpacks in seven years.  I bought an Adidas backpack in Kindergarten, and it lasted until the end of 5th grade.  So I've included a few because the quality was great.

Outside of prepping for the first day of school with clothes and supplies, it will also be important to set up their workspace for success.  I've been brainstorming what will he actually need to get work done.  Even though I did build a desk this past spring, I think we need to add more functionality for this longer term use.  So I will be putting together a list of desks and desk supplies to help set them up since I know not everyone will have time to build a desk.

What ideas do you have for making the first day special this year?  Have you ever forgotten to take the First Day picture?

(This post contains affiliate links provided at no charge to you, but allow me to make a small commission to support this blog.)
Read More

Series: An 80's Kitchen DIY Reno - {Part 13- Refinishing Floors with Water-based Polyurethane}

Friday, July 24, 2020

During the Kitchen Reno, we actually had another project, a bathroom reno,  happening upstairs simultaneously because of a water leak.  So after the countertops were installed, we took a break from major work, but knew we would have to get them done sooner or later. 

We actually had the floors refinished twice.  The original refinish job ended up peeling in a few areas, unfortunately, which was disheartening.  But the company agreed to redo the floors, which was amazing.  So I'm going to share photos from the final job.  It was wrapped up literally a week before our area shut down for COVID-19, and I am forever grateful on the timing of getting back into our home.  And while it was stressful at the time, I can say it was totally worth it, because I L-O-V-E love the way they came out.  

For reference our floors are Red Oak and we used a 50-50 mix of Duraseal Classic Gray and Provincial. and finished them with Bona Traffic HD water-based polyurethane in Satin.  The pictures below are before polyurethane was applied, but let's talk process!

(EDITED TO ADD)
I got a great question on Instagram about the cost to refinish.  Although this job was covered by insurance, we had the floors refinished ourselves back in 2016.  I got several quotes and they ranged from $1.50 to $2.00/sf and $1.50 to $2.25/lf to replace the quarter round.  On our original refinish job, we asked the installer if we could reuse our quarter round and saved a bit that way.  Get several quotes and ask lots of questions. 

On our original refinish in 2016 and this time around, the installers did not ask what brand of stain or polyurethane we wanted.  If you don't ask, your installers will probably just use whatever they are accustomed too, and it may not be the best quality.  Try to do your research, to see what brand and type of stain and polyurethane you want to use.  Water-based polyurethane, as a materials cost, is more expensive than oil-based.  But it can also save time on the job because it dries quicker and can be recoated in less time.   


As a reminder, the floors had to be patched after removing some cabinet pieces to build out the fridge surround and peninsula.  


Sanding Down the Floors

After moving out, the first step in refinishing is to sand off the original finish.  The quarter round is removed first.  Then large floor sanders are used for the main areas, and a smaller handheld sander is used to go around the edges and stair treads.  A handheld scraper is used to get into corners and on the stairs.  The simplicity of the raw wood looks so amazing.


Next they use wood filler to fill any large gaps in the flooring and then sand again. And although the sander picks up most of the sanding dust they also use a shop-vac as they go with the hand sander. They then do a final vacuum before staining, so that there's no grit in the finish.


Choosing a Stain Color and Polyurethane

One of the most important things is deciding on a color. During the sanding stage, samples were put down to select a stain color.  This was especially important because ALL of our floors are hardwood.  I had picked up samples of pre-finished flooring to get an idea on color.  We'd had the floors refinished when we first moved in, and I wasn't totally in love with the color.  It was nice, but super traditional.  So since we were having a do-over, I wanted to tone down the warmth and go with more of a gray-brown color. 

(original stain)

You really want to put down lots of samples to get an idea of the color of the stains.  Stain colors will look drastically different in pictures and based on wood species, age of wood, and the amount of light that a room or home gets.  You also want to take into account any existing stained wood furniture and accessories you currently have if you plan on keeping them long-term.  You want your floors to compliment not clash with your decor.  An example being the darker wood samples in the photo below.  I liked them, but they veered too gray for the other wood toned furniture and accessories I have in my home. 


No color combos on paper looked the same as they did in my home, so sampling was important.  Also our floors downstairs are 30 years old, and the upstairs floors were installed in 2016.  As I mentioned earlier, our floors are all Red Oak.  I know when I was researching stains, it was helpful when the photos would list the wood species.  After many samples, we decided on a 50-50 mix of Duraseal Classic Gray and Provincial oil-based wood stain.

From our original refinish job when we moved in 2016, I also remembered how bad the fumes and smell was after moving back in.  It lasted for days even with the windows opened, and I'm sure it wasn't healthy to breathe in.  So this time, I looked into water-based finishes.  I wish I could say I thought of this ahead of time, but I only thought of it after the floors were stripped and had to do a lot of research on the fly.  Even though we used an oil-based stain, using a water-based polyurethane made a HUGE difference.  The stain had fumes so bad that it set off our carbon monoxide detectors. (Who knew that was even a thing?)  But the next day when the water-based polyurethane went down, it was a night and day difference.  And by day two, it was barely noticeable. 

With the smell set aside, there is a richness of stain color that is brought out with oil-based polyurethane.  I don't think it can be replicated with water-based polyurethane.  But the more matte/satin finishes you get with water-based polyurethanes are more in line with the sheen you find on pre-finished wood.  I don't think one is better than the other, it's just a matter of preference and how you will handle the off-gassing. 

Moving Back In

Besides low fumes, another advantage of the Bona Traffic HD polyurethane is the cure time.  It's safe to walk on without shoes after 24 hours.  And after three days, it's fully cured and hardened.  Whereas, an oil-based poly can take up to 30 days to fully cure.  We moved back in the day after the floors were finished, but waited the full three days before bringing back in all the furniture.


One recommendation I read from Bona is to use 'walk-off mats' at the doors to help preserve the finish on the floors.  This is meant to catch any shoe debris from the first few steps a person takes inside the home.  I'm a shoes-off person, but not everyone is.  So I have a mat at both the front and garage doors.  


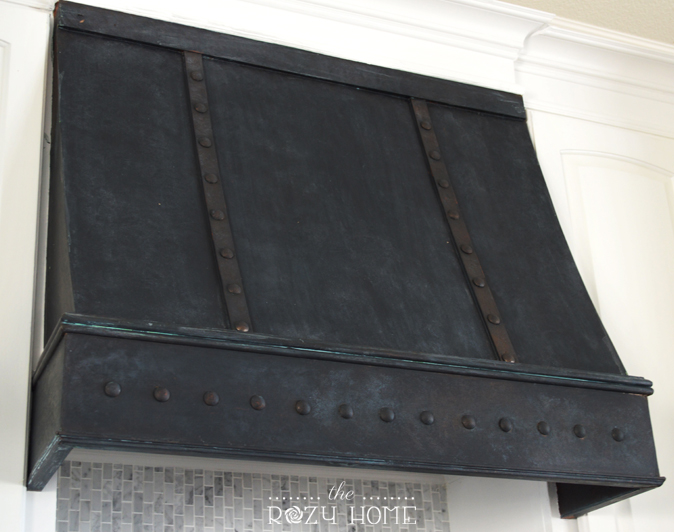
It was nice to have this major project behind us.  We have had zero issues with the finish this time around. I still want to share painting the windows in the kitchen and adding the wood vent hood cover. 

We're also getting close to school starting in our area, so I'm thinking of sharing some of our prep for that.  How far out is school where you live?  We were already planning on schooling at home, but our county opted this week to cancel all in-person classes.  So prepping for school-at-home is something I think we're all doing.   Planning for it has been on my mind, but now is time to turn those ideas into action. I'll be doing a post about that soon too! 

KITCHEN SOURCES (linked below): 

{An 80's Kitchen DIY Reno Series}


-Part 12-Marble Tile Backsplash and Sconces


Read More

Series: An 80's Kitchen DIY Reno- {Part 12-Marble Tile Backsplash and Sconces}

Thursday, July 23, 2020

We are nearing the finish line of the Kitchen Reno with adding the backsplash.  This part I did not do myself, but hired my tile guy who had recently refinished a bathroom for me.   He was the first and only tiler I have ever hired, and he did not disappoint.  He's a fast, one-man operation.  I picked marble tile to go with the counters.  It's such a beautiful stone, but I thought I wouldn't see much of it on a horizontal surface. So why not bring it up vertically!


I've used the off-the-shelf marble subway tile from both Home Depot and Lowes, and I like both. Home Depot's 3x6 marble tile is a whiter/lighter gray mix.  And Lowes' 3x6 marble subway tile is more gray.  The gray tones were a better fit with the marble counters I chose.  They both come in one square foot individual boxes. 


(Home Depot Marble Subway Tile -used in Guest Bath)

Mix Your Boxes of Marble Tile

My biggest piece of advice when using marble, especially if by DIY, is to mix your boxes of tile. There are variations in color in marble, so like it says on their website, mix and match different boxes together to achieve an overall uniform mix, and not big patches of one shade of gray. I personally opened up boxes and mixed the tile for my tile guy. He is VERY skilled at laying tile, but I don't think he was going to go thru and do that.


I have to share a blip that happened while the backsplash was being put up.  I originally planned to have a tile inset behind the cooktop with a border and mosaic tile inside.  As it was being done, the scale felt so wrong!  


It may not seem that bad in the pic, but in real life it just felt dinky.  It may have been because my cooktop is a 30" which isn't the largest.  But I also realized after it was complete, that I hadn't purchased enough of the border tile to make it any larger.  And the tiler had made it as big as he could with the materials I had on hand.  Now, I wish he had just told me that.  At the time, after he left for the day, I still couldn't shake the feeling that the scale was wrong.  And he was coming back to grout the next morning.  I had to "phone-a-friend" (thanks Quiana!), to get an honest second opinion from someone with a good eye.  We both agreed it was a little too small.  

It may not have bothered most people, but I personally knew that it would bother me for the rest of my life.  Lol, ok that's probably a little dramatic, but I knew that it would bother me.  And since I plan on being here for quite a while, I had to change it.  I didn't even want to bother with trying to make it bigger, so we just went back with more subway tile.  And to be honest, I like the clean-lined simplicity of just the subway tile, no frills.


On the kitchen sink wall, I used the matching pencil tile along the edge where the countertop ended to create a finished edge.  I should also add that crown molding was added to this wall, before tiling, since it came down with the cabinets that were over the sink. 


I purchased UltraColor Plus grout in White. ALWAYS use unsanded grout for marble. Sanded grout can scratch the surface of your marble. 

Read More

Series: An 80's Kitchen DIY Reno- {Part 11- Converting from Electric to Gas Cooktop}

Wednesday, July 22, 2020

At this point in the renovation, I was so excited. It was finally back to looking like an actual kitchen, and after cooking in my dining room for weeks, I was ready to move back in.  


The kitchen originally had a smooth top electric cooktop.  It was in good working order and had no cracks, so it seemed a waste to throw it away.  I was removing the countertop and needed to take out the cooktop anyway. I made sure to clean it up really well. And after seeing what used cooktops sold for online, I listed it on Facebook for $120 and it sold in a day.  Something to consider if you're remodeling and some of the appliances are in good working order.


Before the reno began, I had to figure out who installs gas lines?  I think it was primarily HVAC companies, but locally not all of them offered the service.  So you may have to call around.  The house did already have gas for a fireplace and furnaces.  So they were able to tap into the existing pipe in the basement and run it up thru the cabinet to where the cooktop was.  It is dependent on the current usage of the appliances on the gas line, but there was a small enough load, that they were able to add the cooktop without running it all the way back to the outside line.  A gas cooktop also needs a plug, but I was able to use the existing outlet under the cabinet.  


I had the gas line run after the countertops were installed and the company also connected the cooktop.  Even though I wanted gas, I was a little afraid of it!  We've probably all heard stories about CO2 poisoning and houses exploding.  But the installer did a good job of showing me how to use the shut-off valve he installed beneath the counter to turn off the gas, and how to turn the cooktop on and off.  He also explained that the clicking noise you here when you turn on a gas cooktop is the sparking mechanism that lights the gas.  That's why you need electricity.  He said technically you can manually light the stove if the power goes out.  I don't know if I will be that bold, but we haven't had the need to try so far.

The drawers weren't back in the kitchen yet, when I had the gas line run.  When I did bring them back in, one of the drawers under the cooktop, couldn't close all of the way, because of the position of the gas connection.  I ended up taking apart the drawer and shortening it to fit, instead of ordering a new drawer.  


The side panels of the drawer were connected to the back panel by a few nails, so I used a rubber mallet to knock them loose.  Then the bottom panel slid out of the groves in the drawer slides.  I cut down the bottom panel and the drawer sides and reassembled the drawer.  Unfortunately, I didn't get any pictures while I was doing the work, but let me know if you have any questions, and I will try to answer them.


 Want to see the work leading up to this?  Check out the Kitchen Reno Series.

Appliance and Sink Sources:  Cooktop | Vent Hood | Double Oven | Faucet | Sink | Sink Strainer | Soap Dispenser

Read More